The structured light optical measurement system: an analysis
The structured light optical measuring system
The principle on which the structured light optical measurement system is based is similar to that used by our visual apparatus, which allows us to grasp the three-dimensionality of what surrounds us.
The Advanced Topometric Sensor is an optical measuring system that allows the contactless digitisation of small, medium and large objects, without any constraint of shape, weight or displacement of the object.
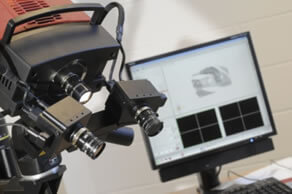
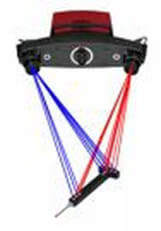
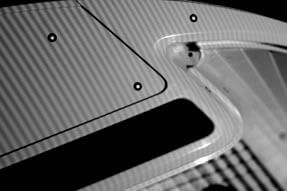
The system consists of a sensor and a pair of cameras spaced apart and converging towards a point with a well-defined angle. The system, by means of the sensor, projects a light grid on the surface of the piece, and the two cameras, driven by the computer, generate a pair of images.
These images, suitably processed by the management software, determine the 3D coordinates of each point within the digitised areas.
The point cloud produced by digitisation is processed by dedicated software, which transforms everything into STL or IGS surfaces.
The system allows:
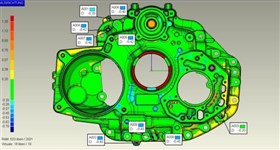
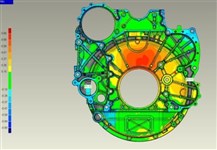
- the evaluation by superimposing the deviation between the digitised physical model and the reference CAD model, and then the certification of the measured objects through color-coded and numerical mappings in 3D mode
- measurements, analysis, checks, dimensioning in 2D mode, also through sections of the digitised object
- the virtual assembly of several digitised components, in order to analyze or highlight possible sources of error
- the generation of the mathematical model (Reverse Engineering).
Compared to traditional measuring systems with CMMs, the optical measuring system has many advantages:
- Speed: the speed of data acquisition reduces analysis times.
- Comprehensibility of the results: the measurement results are easy and immediate to understand, if compared with the reports of the dimensional surveys performed with traditional CMMs.
- Completeness of measurements: the very high sampling (5,000,000 points for each single shot) allows to analyze the detail in its entirety, while with the CMM the evaluation is limited to the points probed.
- Flexibility: if the customer so wishes, with a free version of the measurement software he can obtain the necessary measurements independently and at any time.
- Versatility: with the optical measuring system it is possible to measure details of any size.
- Portability: the optical measuring system can be easily transported to the customer; in the case of parts of high size and weight, this allows a considerable saving in terms of transport costs.
- Control of the production process: by superimposing the scans performed on several particular products at different times, it is possible to keep the production process under control over time.
- Design control: by superimposing the scans, it is possible to simulate the assembly of several mechanical parts
- Comparison of details: the mathematical model built by digitizing a particular can be used to measure another similar one.
Contact us and we find the solution for your needs
Since 1992, we have been supporting companies in solving problems related to dimensional measurement and verification by also tackling customised projects.